Showing posts with label tips and techniques. Show all posts

Sunday, June 7, 2015

Tips & Techniques - WIP Storage

It's been quite a while since I've done a tips & techniques post.  There are so many of them out there, that I like to share one only when I think it's something good that people may not have seen before.  I believe this one may qualify.

I wish I could take credit for this idea, but alas I can't, as I picked it up from some of the ladies I've been stitching with in my new hometown.


Most of the ladies I stitch with on Thursdays and Saturdays have the System 4 Needlework stands (which I don't) and work on large, detailed pieces like Mirabilia designs.  They all use the cute little Q-snap covers (that I don't), and each have their own system of floss storage.  One of the other things they all have in common are these plastic covers they put over their pieces when they're not working on them to protect them from dirt, pet hair, etc.  After a couple of weeks of stitching with them and being envious of their covers I finally decided to ask where they got them.  Let me tell you I was shocked, and had one of those "smack my head" moments when they told me.  Are you ready for this????


They're just plastic, saran wrap like bowl covers!!!  Absolutely brilliant! 


Of course I had to go buy some.  I checked at my grocery store...no luck.  Went to Target where the one lady said she gets them...they were out.  I had to go to the evil of all places retail the other day (yes, that would be WalMart) and low & behold they had some there.

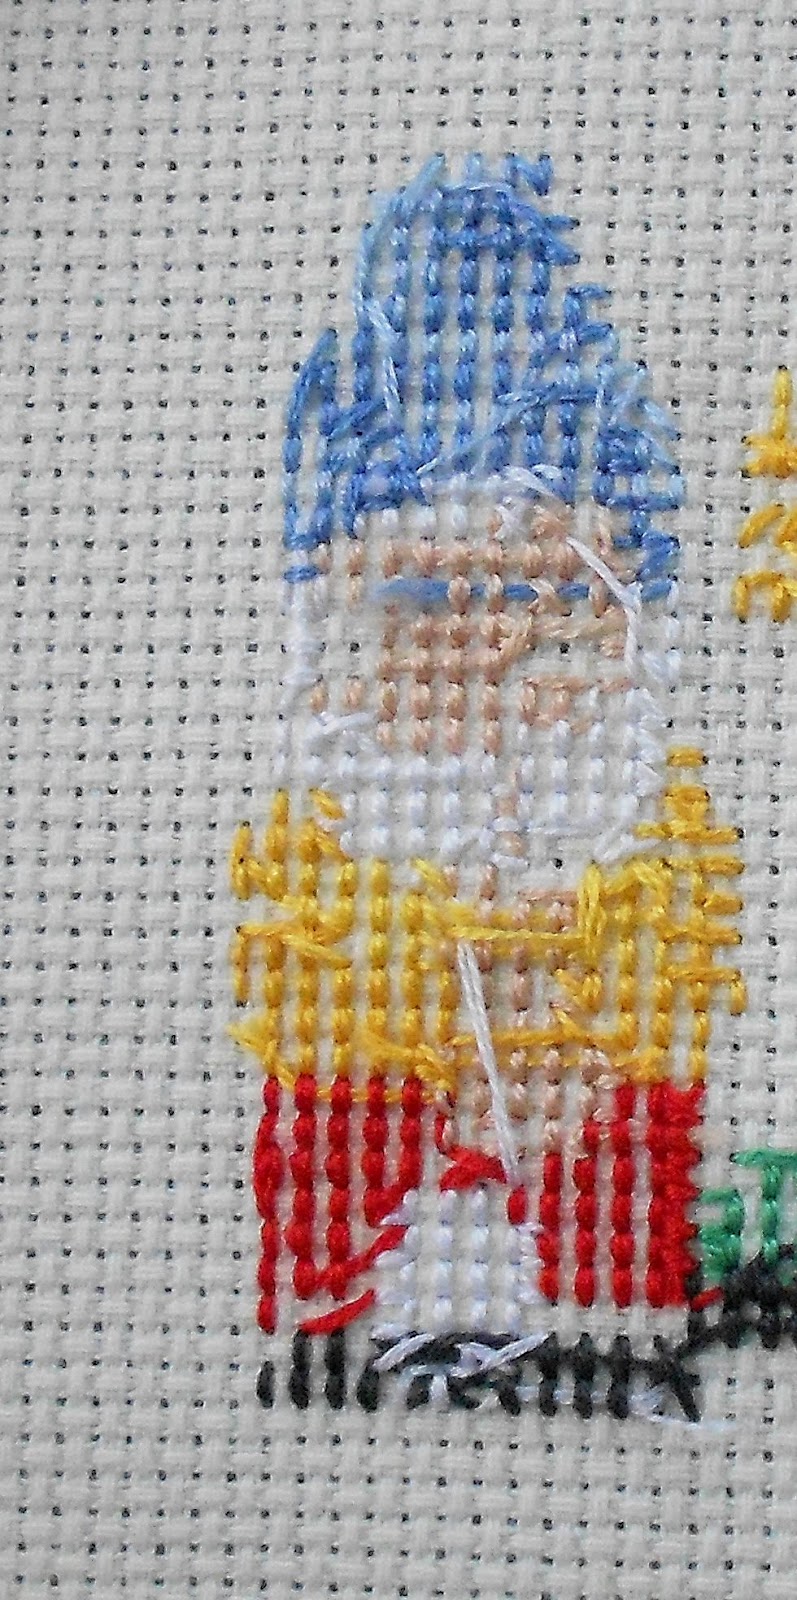
They come in multiple sizes, as you can see from the photo, so they're great for a variety of projects.  I've taken some pics of some of mine.

This one is a project I have in a 8x8 Q-snap.  And yes, that IS a hair clip I'm using to hold my extra fabric.


This is a project I have in a 12" hoop.  If you look at the bottom right corner of the photo you can see the shine of the plastic, as this looks like there's nothing even covering it.


And this one will show you the back side and how they fit around.


Not only will they protect the front side of your piece, but you can also tuck your pattern right in there with it.  I also have a couple of my projects with a separate little baggie that has my floss and misc. stuff I've been tucking in the front also.  Now that really only works if you're toting a couple colors around with you at a time for a small project and not something large.

Anyway, I'm trilled with my $1.98 purchase that will now help keep my stitching clean when I'm not working on it.  I hope some of you find this useful also.

Happy Stitching!

Sunday, September 28, 2014

Tips & Techniques - Stitching With Variegated Fibers

Even though I've been stitching for 35+ years, I'm nowhere close to what I would consider "expert" level, and I love to continue learning new things that can help me improve my needlework.

Recently I attended my first ever stitching retreat.  While I was there, a fellow stitcher and I were discussing using variegated or overdyed fibers.  I've used them before, but not often.  I've always heard that when you stitch with them, you should make each full "X" and then move onto the next stitch vs. stitching one leg (or half stitch) down a row and them coming back and stitching the other leg.  This picture shows a piece I stitched using that technique.


It looks nice enough, but has sort of that "stripey" look that you'll get.  I'm not particularly fond of that look myself.   

Here's where the tip comes in.  My stitching friend had mentioned instead of stitching in rows and getting that "stripey look", even if you are making full Xs for each stitch, to jump around and give it a more blended look.  For me, this was a SMH (smack my head) moment!  Why hadn't I ever thought of that?!  And why hadn't anyone ever told me that before?!

Soooo....I decided to take some of my stitching time today and put it to the test.  In the picture below I used two different DMC variegated threads I had in my stash (the pink is #48 and the green is #122).  I did this as a controlled test, meaning both techniques were stitched from the same length of floss from a cut strand and threaded into the needle the same way to ensure there would be an accurate comparison as to how the different techniques would look.


You can see on the left I stitched in rows, starting in the bottom left, working to the right (using all full Xs).  I zigzagged my way back & forth until I ran out of floss on the strand I cut.  On the right I used 2 more plies the same strand of 6-ply floss and randomly jumped around with my stitches, to give it a more blended look instead of stripes.

I'm curious...which look do you like best?  How do you normally stitch when you're using variegated or overdyed fibers?  Feel free to comment below.  

Happy Stitching!
-K.

Tuesday, November 13, 2012

Tips & Techniques - Facebook Biz Page "Schedule" Feature

I thought I'd do something a little different today and branch outside of the needlework realm. 

I know so many people online that have Facebook business/fan pages and don't know about one of my favorite tools.  It's the "schedule" feature.  Sorry peeps, it's not available for personal pages.

It's super simple.  You just add your photo, status update, whatever.  Then before you click the "post" button, you click on the little clock icon in the lower left corner (see photo below).  That will then bring up different links for scheduling your post (year, month, day, hour, minute).  Once you select all the criteria you want your "post" button will now become a "schedule" button.


If you're like me, and work multiple jobs with long hours outside your business, or even if you're really busy with your business and/or family and just can't spend a lot of time on the computer, it's a great tool to use.  I typically schedule 1-3 posts that will then share at different times throughout the day while I'm at work, have a busy day running errands etc.  It's great to be able to connect with my fans & customers that are spread out over various time zones throughout the world, as well as not bombarding them with a bunch of stuff at one time while I'm able to be on the computer.

Hope this has helps people out there organize their time a little better.  We all know time is something we can always use more of.

Tuesday, October 23, 2012

Tips & Techniques - Magnifiers

It's something that many of us have to deal with, and don't always like to admit...needing to use some sort of magnifier to be able to stitch our projects.

I grew up wearing glasses from the age of 6, just to be able to see/read ANYTHING, let alone doing my needlework.  There were times I needed a magnifier and many, many years ago there weren't a lot of options on what you could use and still hold your needlework.  I ended up going with the hands-free over your head magnifier like this:
I never personally cared for it.  I thought it was uncomfortable to wear and the stitches were soooo huge it was harder to stitch with it than without it, so I stopped using it (but still have it just in case I need it in the future).

You can also get the type of magnifiers that clip onto your project.  They come in different sizes and magnifier strengths.  Again, I personally don't care for these as I don't use a frame stand and hold my project in my hand, so I think it is difficult to handle as it adds some extra weight to the hoop/qsnap frame.

Well 9 years ago I was lucky enough to have Lasik surgery on my eyes.  I went from being nearsighted with a -7.75 prescription to being able to see 20/15 (yes, they corrected my eyes better than normal 20/20 vision!!).  As time is creeping up on me and I'm now in my fabulous 40's, my vision has started to slip a little on some of the fine details (as expected, but not enough to need a "touch up" on my surgery).  I have found the perfect magnifier for me is simple reading glasses or "cheaters" as a lot of people like to call them.

I've found a local discount store where I can get them for $.88/pair and I DO get them in all kinds of funky patterns and styles.  People do tend to look at me strangely in the store when I'm trying them on because instead of standing there with a book or magazine to get the right strength I'm standing with a piece of fabric in my hands, lol!  I have different strengths I use for the different count fabrics I use.  And I don't always use them.  If I'm stitching on a 14 or 16 count fabric I typically don't use them.

These three options are just a few of the many that are out there.  Most people have their favorite just as I do, but I figured I'd at least highlight a few of them for those that have problems seeing their fabric/stitches and have never considered using an aid that can help them continue on with their stitching for years to come.  :)

Tuesday, October 16, 2012

Tips & Techniques - The Basic Tools

In my opinion, there are 3 basic tools you need to have when you're doing any type of needle work....a good pair of small sewing scissors, a needle threader and some sort of needle case.

Below is a picture of the ones I have.  Mine are just the basic/generic ones you can get at any craft store.  I've had all of them for years & years.  In fact, I think some of my tools are probably older than my 20-year-old son, lol!


Scissors - you want to have a small pair with a fine point end that is great for snipping those threads really close to your ground (fabric, canvas, whatever).  My main pair are Fiskars.  I also have a pair of the ever popular "stork" scissors, that I keep in my stitching bag that travels with me.  A scissor fob is completely optional.  The one attached to my scissors was a gift from a fellow stitcher several years ago.  It's definitely been helpful for me on the times I've left my scissors on my lap, instead of putting them back on the table, and they have slid down into the couch/recliner.  Admit it, we've all done it.  :)

Needle Threader- it's a great tool to prevent you from licking the end of your floss so you can get it through the eye of the needle.  I use a generic DMC one that has 3 different sizes, as I do stitch many different types of projects that all have different needle sizes and different thicknesses in fibers.

Needle Case - You'll need a needle case to keep all of your needles in.  I like to have one with a magnetic strip on it so I have someplace to sit my needle while I'm grabbing my next strand of floss, etc. I personally never leave a needle in the fabric of my piece when I'm not working on it.  Having the magnet also helps eliminate the worry of a needle falling on the floor and someone stepping on it.

Now if you like to have "fancier" tools, there are all sorts of options for them.  I personally love all the products my friend Tommye over at TJB Designs has in her shop.  Follow the link above to stop by and check them out.  Oh, and she offers gift certificates too, which are always a great idea for our significant others to get for us stitchers.

Tuesday, October 9, 2012

Tips & Techniques - How to "End" A Strand of Floss

Yesterday I had the question asked "How do I end my floss without it looking messy?"

I guess the definition of the term "messy" can vary by person, where one person can think it looks good and another will think it's not.  Hence the saying "Beauty is in the eye of the beholder".


I'm sharing a picture of part of a piece I'm currently working on.  For the 35 years I've been stitching I've always ended (and started) my strand of floss the same way, by running it under stitches that are close to it.  I always try to run it under stitches of the same color, but that's not always possible, so I try to use a color that's as similar as possible.


Once I'm done completely stitching the piece I'll go along and trim up all the pieces that stick out from the threads, like the blue that is running through the tan, so there aren't any "tails" sticking out.  I still do this even when I'm covering the back of the piece where someone won't be able to see the stitches.

Hopefully this clarifies the question and might teach someone a new technique.  :)

Tuesday, October 2, 2012

Tips & Techniques - How to "Jazz Up" Your Hoop Frames

I showed you previously how to "frame" your piece using a wooden hoop.  Today I'm going to show you how you can give it new life besides looking like a plain ole light brown hoop.

There are two techniques I'm going to show you today, and they're both relatively simple.

The first one is to simply paint your hoop using a non-toxic acrylic craft paint.  I have 2 examples for you. One I painted a flat black and the other I painted a metallic gold.  Your paint choice is entirely your own personal preference.  I like to go with something that will compliment the stitched piece.

You really only need to paint the top portion of the hoop as the back is typically against the wall.  If you're making smaller ornaments or something that is going to dangle where the back can been seen, you might want to paint the bottom portion of the hoop as well.


The second technique is one that's new to me, but I think I'm hooked after only the first time of doing it.  It's ribbon wrapping your hoop.

The instructions I saw in a magazine said to put a small piece of double-sided tape on the inside of your hoop to hold the ribbon in place.  I found the double-sided tape I have didn't want to stick to the wood, so I used a small dot of tacky glue.  Once I started wrapping the ribbon around I put a small binder clip on the hoop/ribbon to hold it in place at the glue spot while it was drying.  You just keep wrapping and overlapping the ribbon until you get to the other end of the hoop.  Again, more tacky glue and a binder clip to hold in place.  I apologize for not taking step-by-step photos, but I didn't think about using it as a tips & techniques post until after I had the piece completely finished.  


The spool of ribbon I used was 5/8" wide and was 6ft. in length for a 5 inch hoop.  I had about 1 foot left over that I used to hang the piece from.  So with that it appears you'll need about 1 foot of ribbon for each inch in diameter of the hoop.  The ribbon really gives the piece more dimension and a texture it wouldn't have had in just a plain wood hoop.

I'll throw in a money saving tip for you also...don't be afraid to put your stitched piece in a bag and take it to your local craft store with you to match a paint color, ribbon choice, etc.  You'll be able to see the colors together and will save money by not having to guess.  Yes I know you can always take it back, but if you get it right the first time around there won't be any valuable wasted crafting/stitching time and/or wear & tear on your car (not to mention $4.00/gallon gas!!).  The "regular" employees at my local JoAnn Fabric & Crafts and Hobby Lobby are used to seeing me in there all the time with various stitching/craft projects trying to get just the right match on something.

I hope you've found this post helpful and I look forward to seeing pics that you want to share!  :)


Note added on 10/9/12 - Now that I've wrapped a couple of other hoops I've learned some additional tips.  A grosgrain ribbon is much easier to use than a velvet, as the velvet was almost too thick to be able to get the fabric in the hoop with it on.  Also, a thinner ribbon in width is also easier to work with, like using a 5/8" width vs. a 7/8" width.  Just a few observations that I hope will help others.

Tuesday, September 25, 2012

Tips & Techniques - What Size Fabric Should I Get?

With so many stitchers buying patterns only, and not complete kits like was the norm of the past, I'm often asked for help in figuring out what size fabric they should get to go with their next project, so today I thought I'd try to tackle that question.

First, the count of the fabric is all a personal preference.  If you're purchasing Aida you can get 11, 14, 16, 18 or 22 count.  If you're going with a type of Evenweave or Linen you can go anywhere from a 20 to 40 count.  The count fabric you choose will depend on the size (dimensions) of the fabric you need to get.

And yes, I know there are many "fabric calculators" online that you can use, but what do you do if you're in a bind at the store and you're like me without a smart phone?  You have do to things the "old fashioned" way.

So here goes...

Basically you divide the number of stitches by the count of the fabric.  So for example, if you have a pattern that is 98w x 144h and you want to use an 18 count fabric instead of the 14 count the pattern suggests, you would divide like this:
98 / 18 = 5.4 inches
144 / 18 = 8 inches


Now you need to remember, the dimensions above would only be for the stitched area, and don't include any border that would be needed for finishing the piece.  You typically want to add 2-3 inches PER SIDE.  So your 5.5" x 8" fabric now becomes a minimum size of 9.5" x 12", with a 2 inch border.  If you want a bigger border you will need a bigger sized piece of fabric.

If you're using an evenweave or linen and stitching over 1 thread, you would use the same type calculation.  However, if you're stitching over 2 threads, you need to remember to "change" the count size.  Here's and example using a 32 count linen:
32 count fabric stitched over 1 thread
98 / 32 = 3.0 inches
144 / 32 = 4.5 inches


32 count fabric stitched over 2 threads
98 / 16 = 6.13 inches
144 / 16 =9 inches


I'm sure you can see it will make a big difference in choosing the right sized piece of fabric.

Hopefully you're not reading this post thinking it's "clear as mud" and it has helped at least one person that may have this question.

Happy fabric shopping!

P.S.  Our 50% off hand-dyed fabric sale is still going through September 30th.  Click here to see what is still available.


Tuesday, September 11, 2012

Tips & Techniques - Needlework & Airport Security

Just this past weekend I took a girls trip that required airplane travel.  Unfortunately my friends banned me from bringing my cross stitch with me (and if you guessed they're NOT stitchers then you would be correct), but it made me think about what you can and cannot take through airport security when it comes to your needlework.

This picture is a screen shot of the TSA regulations as of 9/5/12 which shows you CAN take your needlework with you.  


The last time I flew was in Feb. 2010 and I took my cross stitch with me to do on the 4-hour flight.  I took a small pair of embroidery scissors with me, but chose my least expensive pair just in case they were confiscated at the security checkpoint.  I also printed the TSA regulations that morning and had in my purse w/the date showing in case I had a TSA agent that wasn't familiar with my items being allowed.

If you're worried about taking scissors with you, there are other options available. You can easily take nail clippers through security and there are a range of thread cutters that are approved for travel.  This is an example of just one of them:


And as I'm typing this I've realized it's scheduled to post on September 11th.  A day that brought upon us most of the airport security measures currently in place.   Being the proud Army mom that I am, I'd like to take a moment to thank all of the brave men & women that defend us on a daily basis as well as remembering the innocents that lost their lives on that terrible day.

Tuesday, September 4, 2012

Tips & Techniques - Tent Stitching

When I started joining a bunch of cross stitch groups on Facebook I saw people talking about whether they should do regular cross stitch or tent stitch their massive pieces from HAED and Mystic Stitch.  I myself wasn't familiar with "tent stitching" so I went to the internet and looked it up.  Needless to say I was a little shocked to find out it's just a half-stitch or what is also called a continental stitch in needlepoint.  Since needlepoint was the first type of stitching I learned, I most definitely knew what that was.

However, after doing a little more research, I guess there IS a difference between the stitches and the difference is how they appear on the back of the fabric or canvas.  I found this description of them through Wikipedia:

 
There are three types of tent stitch, all producing the same appearance on the front of the canvas but each worked in a slightly different way and having particular characteristics, uses, benefits and drawbacks. These variants of tent stitch are known as basketweave, continental and half cross tent stitches[1]:
  • Basketweave tent stitch
    The basketweave form of tent stitch is worked in diagonal rows up and down the canvas. The yarn on the back of the canvas has a typical basketweave Here appearance, with alternating horizontal and vertical stitches. Basketweave is the best stitch to use for covering large areas of canvas as it does not distort the canvas as the other two forms of tent stitch do.
  • Continental tent stitch
    Continental stitch is worked horizontally or vertically across the canvas. On the back of the work, the stitches appear diagonally across two threads. This method uses more yarn than half cross stitch tent stitch but is more hardwearing.
  • Half cross tent stitch
    Half cross stitch is worked horizontally or vertically across the canvas. On the back of the work, the stitch appears vertical or horizontal, not diagonal, and crosses only one thread. This method uses less yarn than other stitches but is not very durable as coverage on the back of the canvas is a little thin.
One of the other benefits, and I think the main one that people consider when doing the extra large size projects, is time savings.  You can cut your stitching time in half because you're only doing half the stitches compared to a full cross stitch.

If you are going to be tent stitching a piece, I have found I typically use more strands of floss than in a regular full cross stitch so that you get the fabric coverage.  I recommend doing a test patch in a corner of your "border" area or on another small swatch of fabric to see how many strands YOU like best for the count of fabric you're working on.

Here's a close-up picture of a piece I did using the half cross tent stitch using a #12 Kreinik metallic braid on 14-count fabric:
 

Tuesday, August 14, 2012

Tips & Techniques - What Size Needle Should You Use?

Have you ever found yourself in your LNS (local needlework shop) staring at the selection of needles and wondering what size you should use?  Yeah, I'll admit I've been there.  Personally I prefer a larger numbered needle, which is actually smaller, regardless of what count fabric I'm stitching on.

I have found an awesome explanation of to what size needle you should use for what count fabric, along with some explanations of the different types of needles over at Cross Stitch Needleshop.  If you're interested in learning more, just click here.


Tuesday, August 7, 2012

Tips & Techniques - How to Create a Hoop "Frame"

Do you like to "frame" your stitched pieces using a hoop, but don't like the messy looking back like this?  Yeah, me neither, and for the record, this piece has a ton of confetti stitching in it.


Well today I'm going to show you how I "frame" my pieces.  I've seen quite a few tutorials over the years with several different techniques, none of which I was quite happy with.  It took me a while, but this one just sort of smacked me upside the head one night and I've been using it ever since.

The supply list is pretty simple...your ironed finished piece, an ironed piece of cotton fabric (I like using plain white behind my light colored pieces), your hoop, non-toxic tacky glue (or another similar glue), fabric scissors and embroidery scissors.  Oh, and most importantly, you'll need a clean work surface as you'll be working part of the time with your piece face down.


Step 1:  Put the fabric behind your stitched piece and place it over the bottom portion of the hoop.  As you can see in the photo, I placed center marks on my fabric (and also on the bottom portion of the hoop) because I wanted to make sure it was centered as well as I could get it.
 

Step 2:  After you've put on the top portion of the hoop, stretched your piece so it's smooth, and screwed the clamp tightly, turn the piece over and make sure your cotton back is also smooth.  If it's not, just loosen the screw some so you can stretch the cotton fabric and then tighten it back up.  I would also take this time to check your piece from the front to make sure the backing fabric you chose doesn't show through. 


Step 3:  Use your fabric scissors to trim off the extra fabric (both pieces)


Step 4:  Use your embroidery scissors to trim the fabric as close to the hoop as you can get it so that it will be smooth.


Step 5:  Use your non-toxic glue and run a small strip of it all the way around the hoop.  Get it all over the fabric and down in any gaps there might be.  I usually smooth mine out with my finger.  The glue will dry clear and will basically "seal" the fabric to the hoop so it won't come out.  I typically put a light second coat on after the first coat has dried.
 

When you're done you'll have a nice "framed" piece like this that doesn't show all your stitching on the back.  If you're using a dark colored fabric to stitch on, I would use a dark colored cotton fabric to back it with so that it doesn't show through any of the holes.
 

This concludes my first ever tutorial.  I hope you found the directions simple to follow and you've learned something new from it.  Feel free to leave any feedback in the comments.  :)

Tuesday, July 31, 2012

Tips & Techniques - Bobbins vs. Stitchbows

I see a lot of questions going around the various online cross stitch groups & forums about how people store their floss/thread/fibers/cotton (whatever you may call it in your part of the world).  I thought I would give my opinion this week and the number one reason behind it.

You'll see below is a picture of some floss on a DMC Stitchbow holder (on the left) and some floss on a cardboard bobbin (on the right).  These are both DMC floss that I have pulled at random from my stash.  Each color is nearing the end of the skein.  You can see with the stitchbow that the floss is still straight & free of kinks whereas the green floss that has been stored on a bobbin is all kinked up, and typically causes me to deal with more knots than my floss that is stored on a stitchbow.  That in itself is my #1 reason for switching all my floss over to stitchbow holders.  I've been converting over the past 3 years or so, so I've been able to spread the cost out over time.


If you decide to convert to stitchbows you'll need 3 things to make it work.  First you'll need the stitchbow holders themselves, you'll need the pages to put them in, and you'll need a binder to keep them in.  The holders & pages are available at most major craft stores (Hobby Lobby, JoAnn's, etc.) as well as many online stores.  As far as the binder, you can get any 3-ring type that is available at your local dollar store, office supply store, etc.  I've picked mine up at various places and none of the colors match, but I don't really mind.  

Here's a picture of what it will all look like in a binder.  No, the numeric labels don't come with the pages, I did those myself with my label maker (my Dad would be so proud, lol!)


Tuesday, July 24, 2012

Tips & Techniques - Working with Metallic Threads

I love working with metallic threads in my needlework projects.   They can add that little punch a project needs or be the entire project itself. If you've never worked with them, it can be intimidating.  I've found there are a couple of important tips when working with metallics.
  1. You want to make sure you're working with a good quality thread.  The thinner (and usually cheaper) threads tend to fray and break easier.  I personally prefer Kreinik threads.  They cost a little more than some other brands, but I find it's well worth it.
  2. Using a medium like beeswax or Thread Heaven works well in "lubricating" the thread so it will slide through the needle and the fabric smoothly.  Again, my personal preference is beeswax, but only because I've never tried Thread Heaven.  The beeswax will typically come in a package like this and is available at your LNS (local needlework shop) or you can buy them online at sites such as 123stitch.com  If you're using the beeswax all you have to do is run your strand of thread over the wax prior to threading your needle.

Just remember, it's like any other technique or medium you use.  The more you use it, the more you'll get used to it, and never be afraid to try something new.

Before I leave you for today, I thought I'd share a piece I stitched entirely in metallics.  :)


Tuesday, July 17, 2012

Tips & Techniques - Railroading

Even though I've been stitching for 30+ years, I'm still learning new things on a regular basis.  There have been many times I've seen ladies in my cross stitch groups on Facebook refer to "railroading".  I myself had never heard the term (I haven't had too many classes and am mostly self-taught), so I was always curious what it was, but didn't want to seem dumb and ask.

Thankfully in issue #164 (June 2012) of Cross Stitch Crazy magazine, they had an excellent diagram and explanation of railroading.  I've included a scan of the picture from their magazine that will show the technique.

I've started using this technique since I saw the example in the magazine and have to say I'm really happy with the way my stitches look.  It slowed me down a little bit at first, but now that I've been doing it for the past 2 months, I'm stitching just about as fast as I always was.

Do you have any experience with the railroading technique you'd like to share?